I was in the process of taking pics of my sugar skull making, when low and behold, one of my blogging homies posted a wonderful tutorial. Why re-invent the wheel, when I can just post her blog and introduce you to a juanderful blogger and artist? Her blog is called Rodrigvits Style and she has mad love for my culture! Can you blame her? haha, just keeding! Actually, she has a great eye and I love her style. I found her by way of lurking, and I am glad I did! Her blog has lots of color and texture and you can spend hours scouring over all her posts and links.
Anyhoo, she did a two part series on sugar skull making, and with her permission, of course, I am featuring her tutorial right here, but do go visit her page, I guarantee, you will mark it as your favorite, as did I!
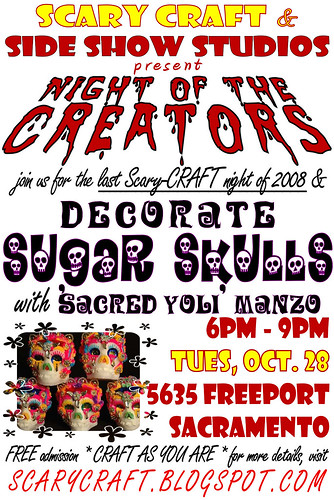
Oh, and before I forget, for you local Locas, do come out tonight to Side Show Studios, I will be doing a workshop on said sugar skulls and you will be decorating your very own for your "Ofrenda"

Ok, feast your eyes!
Sugar Skull Tutorial...part 1
Let's make Sugar Skulls, those colorful...decorated skulls that hold infinite possibilities for art and fun. You can find everything you need including molds, icing powders and meringue powder at www.mexicansugarskull.com
This is sooooo easy, mix 5 lbs of white sugar (this is a GREAT use for the stuff), 1/4 cup meringue powder and 10 t water. This makes enough for about 14 medium skulls, fronts and backs.
Mix all ingredients by hand for about 5 minutes...until it is the consistency of beach sand, the white sugary kind of Florida beaches...
Get a helper if you can to cut out pieces of cardboard and to cut out the skull molds while you are mixing.
Said helper may even take photos of you pushing the sugar mixture into the molds....thanks Mr R...
Flip the mold onto a piece of cardboard, the mold will slip right off.....
and let them dry for 12 hours, you may need to go out for dinner since the kitchen table is otherwise occupied.
Mix up a small batch of icing to 'glue' the fronts and backs together....
Part II will be using the same meringue powder with powdered coloring to make the icing and decorate the skulls....
Sugar Skull Tutorial....Part II
After the sugar skulls have dried it's time to have some FUN with them...
the traditional way to decorate is to mix the meringue powder with powdered sugar, water and dry, powdered food coloring. Mix with an electric mixer for 10 minutes then put in pastry bags and use different shaped tips to create your designs.
The sugar skull mold I used was fairly small and all those steps to make the frosting didn't agree with my 'instant gratification' attitude. I found that glitter glue pens work REALLY well....I also tried painting gesso on one skull and had some very interesting results. It started reacting with the sugar...'I'm melllllltinnnnggggg'...and the glitter glue ate into the surface. The effect is this bumpy texture and embossed design.
I love it!
So, there you go....grab some pens and just go crazy!
I'd love to see yours....maybe they will be part of your Dia de Bloglandia celebration....drop me a comment if you are going to participate....only 1 week to go!
****************************************************************************
Oh yeah, she is having a Dia De Los Muertos celebration on her blog. How cool is that? Hope to see you there!
Comments
I'm in the process of making my ofrenda right now. Painting cardboard cups for the offerings. I wish I could attend your class, though! :)
I have never made them without molds. But give it a try. The merengue makes the sugar nice and stiff. You could make lil round balls and form them into shape. Or don't used sugar. Try paper mache, or clay. Or go to the dollar store and buy regular skulls, paint them white and add lots of color and glitter! Haha, I will make skulls out of anything!