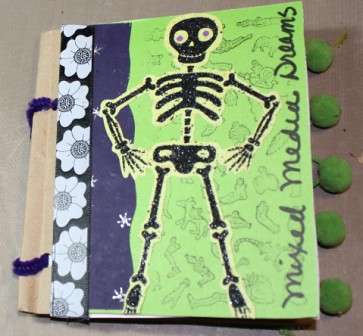
To follow up on my previous post, here is my version of a very popular DIY art journal.
I love this project, it is so easy and you can make a ton of blanks and have them ready for your next vacation, party, or special event. Each page has a pocket to hold more of your treasures, pictures or tags.

Lets get started, shall we?
Supplies: (Base)
2 lunch sized lunch bags
a hole punch
scissors
glue stick
A pipe cleaner or ribbon
Embellishments galore.
Use anything, collage,paints, fabrics, fibers, stickers, Go for it!
Step 1.
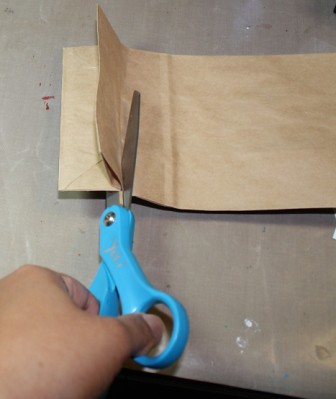
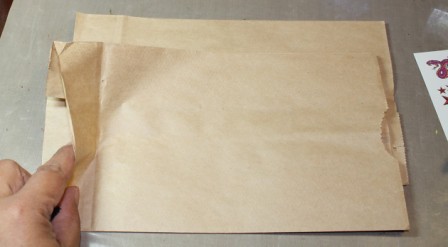
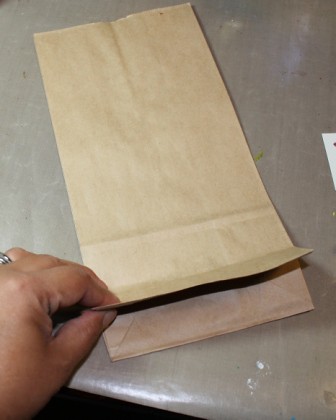 Fold the bottom flap of your lunch bag down and crease. You will be using this crease as a guide to snip off the bottom flap. Do this to both bags. When you are through, you will have openings on each side of your bag. You may discard the bottom of the bag. (we will not be using these for this project)
 Step 2
Fold your bags (horizontally) down the middle.
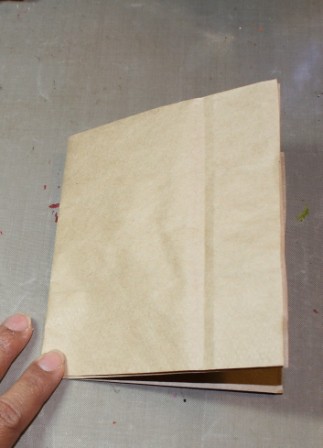
See, it is already looking like a little book, right?
Step 3.
Using your hole punch, punch two holes down the back (folded side) of your bag. You are going to want to do this step, one bag at a time. After you hole punch the 1st bag, put your bag over your blank bag, so that you can mark where the holes are and then punch the 2nd bag. (you just want to make sure your holes are aligned)
After both bags are hole punched, sandwich them (stack) and fold so that you have one book.
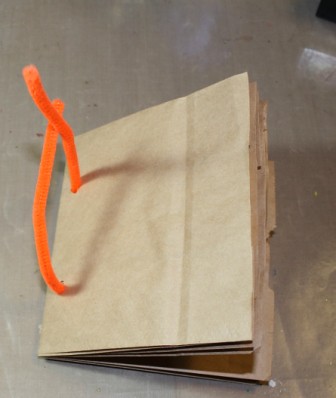
Step 4.
Grab your ribbon or pipe cleaner and thread through both holes to bind the book together. At this point, you may want to add multiple fibers and or charms, etc, to get the look you want.
For this tutorial, I will keep it basic, and use a pipe cleaner. I am just going to twist it and cut it off for a clean bind.
After your book is binded, it should look like this.
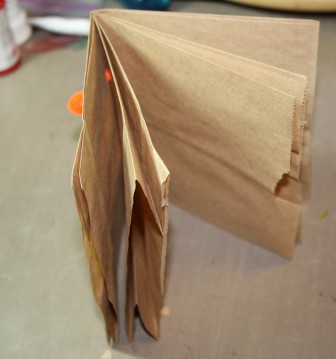 You should have 4 pages front and back, for a total of 8 pages. Each of the 4 pages will have a pocket, so that you can add more mementos!
For real, this part should have only taken you minutes to put together!
Now the fun part starts. Embellishing! Now this part is a whole different story! This part can take you minutes, days, or weeks! Just depends what your subject is. One thing for sure, is this part is the best part, so have fun with it, go crazy. Do it with the kids, it is a great party make and take!
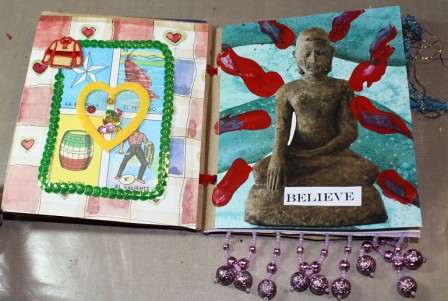
Here are a couple of examples of my inside pages.
 View of my "pocket"
 I was playing with some paint for the background of this page.
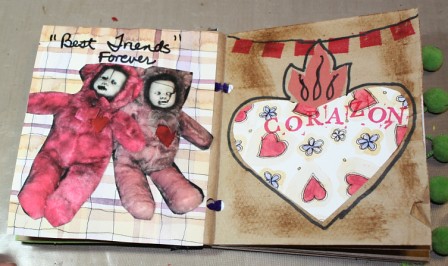
This page, I used scrap papers and postcards from a previous art show. (pictured to the left are art dolls by Bastet2329)
I love this project, it is so easy and you can make a ton of blanks and have them ready for your next vacation, party, or special event. Each page has a pocket to hold more of your treasures, pictures or tags.
Lets get started, shall we?
Supplies: (Base)
2 lunch sized lunch bags
a hole punch
scissors
glue stick
A pipe cleaner or ribbon
Embellishments galore.
Use anything, collage,paints, fabrics, fibers, stickers, Go for it!
Step 1.
Fold your bags (horizontally) down the middle.
See, it is already looking like a little book, right?
Step 3.
Using your hole punch, punch two holes down the back (folded side) of your bag. You are going to want to do this step, one bag at a time. After you hole punch the 1st bag, put your bag over your blank bag, so that you can mark where the holes are and then punch the 2nd bag. (you just want to make sure your holes are aligned)
After both bags are hole punched, sandwich them (stack) and fold so that you have one book.
Step 4.
Grab your ribbon or pipe cleaner and thread through both holes to bind the book together. At this point, you may want to add multiple fibers and or charms, etc, to get the look you want.
For this tutorial, I will keep it basic, and use a pipe cleaner. I am just going to twist it and cut it off for a clean bind.
After your book is binded, it should look like this.
For real, this part should have only taken you minutes to put together!
Now the fun part starts. Embellishing! Now this part is a whole different story! This part can take you minutes, days, or weeks! Just depends what your subject is. One thing for sure, is this part is the best part, so have fun with it, go crazy. Do it with the kids, it is a great party make and take!
Here are a couple of examples of my inside pages.
This page, I used scrap papers and postcards from a previous art show. (pictured to the left are art dolls by Bastet2329)
Comments
happy easter woman!
cyndi
I'm in the process of making something similar from chocolate Easter egg boxes though. ;)
ps. I have your name for the Accessorize With Frida swap. I've already started on it. You're going to love it!
~Tonya
Orale!
Thank you!