Hi My Lovely Chicas,
I have been pretty dormant lately, but I do miss you all and I thank those of you who have subscribed and kept me on your list. I am going to make an effort to blog and comment more. I have been getting my creative Mojo back! I am transferring some tutorial I have from another blog site over to this site. I do hope you enjoy!
Tutorial: Easy Vintage Felt Flower Tutorial
Who doesn't love a little flower now and then. These little babies can
be made a bunch at a time (porque they are so easy) and be used for all
kinds of projects. Jewelry, hair pins, jackets, t-shirts, dolls,
collages, ok, you get the picture. I'll hush now, and get to the
tutorial.
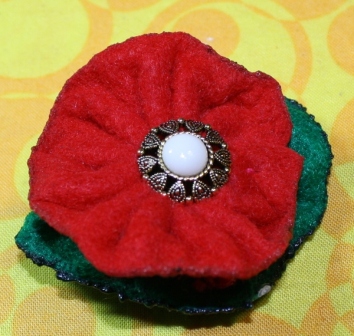
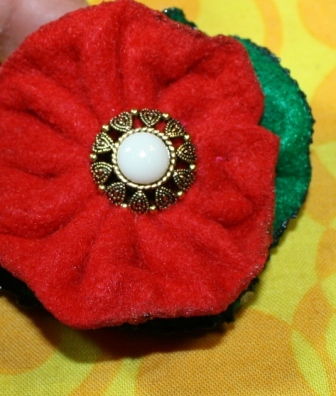
Here is a pic of the finished product. (of course you can do so many variations, but I will keep it basic for now.)
Supplies:
candle (lit)
felt in assorted colors
scissors
embroidery floss
Needle
Decorative button
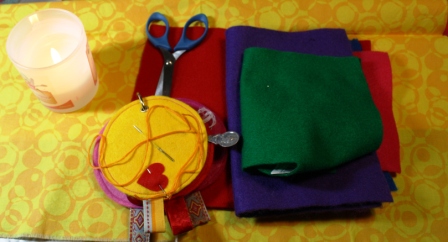
That's it!
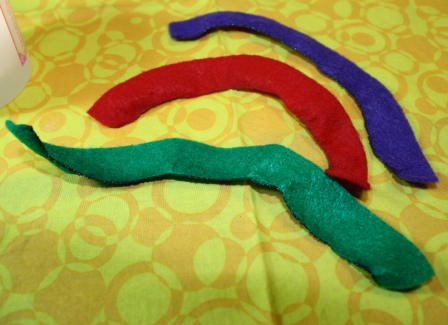
Step 1.
cut
your felt in long strips. the longer your strips, the larger your
flower will be. These strips are about 10 inches and length. You will
want to give your strip a nice soft wavy cut.

Step 2 (this is the fun part)
Grab
your strip and drag it slowly across the flame of your candle. This
will give your felt a nice curve to your strips. Be careful not to go
to slow, or the flame will eat up your felt. Also be careful not to
burn yourself.

When you are done, your strips should look like this.
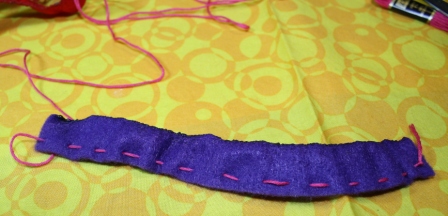
Step 3
On the opposite side of your burned edge, make a simple loose running stitch across your strip.
Step 4.
Pull the end of your string and your felt piece will form a circle.
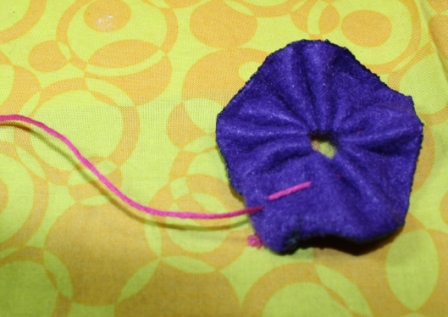
Your
felt strip should look like this. (note, I used a contrasting thread so
that you can see it more easily, but you may want to use matching
thread) Once your circle is in place seal it shut with a small stitch.
For
my Flower, I stacked to circles together to form my flower. After I
stacked my two circles, I added a button in the center to finish it
off. I also can envision a little clay face in the center too. The
possibilities are endless.
Viola!
I glued this to a hair pin for a purrdy hair flower, however I would love to see or hear your ideas!
Comments